Attention. Replacing the timing belt and attachments is carried out on the engine installed in the car.
Removing the cylinder head requires first removing the engine. The engine and gearbox are removed downwards from the engine compartment.
Valve clearances
Attention. Valve clearances are checked and adjusted only on a cold engine. Checking and adjusting valve clearances has some features that must be strictly followed.

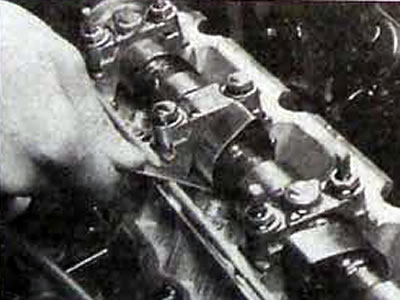
Pic. 1.1. Using a feeler gauge to check valve clearances
Examination
Correct setting of valve clearances is very important, as they largely determine the performance of the engine. If valve clearances are too large, the engine will be noisy and performance will be reduced because the valves open too late and close too early. More serious problems occur if the valve clearances are too small, as the valves may not close completely when the engine is hot, which can cause severe engine damage. Adjust the clearances only on a cold engine.
- Disconnect the connector from the cylinder recognition sensor at the beginning of the intake stroke.
- Remove the bolts and nuts securing the cylinder head cover.
- Remove the cylinder head cover from the engine.
- Turn the engine crankshaft to a position where the exhaust valve of the first cylinder is fully open.
Attention. Turn the engine crankshaft with a wrench using the central bolt securing the pulley to the crankshaft in the direction of its normal rotation. You can also turn the crankshaft with the front wheel raised and 4th or 5th gear engaged.
- In this position, use a flat feeler gauge to measure the clearance of the intake valve of cylinder 3 and exhaust valve of cylinder 4
- Turn the engine crankshaft to a position where the exhaust valves of cylinders 3, 4 and 2 are fully open and check the clearances of the corresponding valves (see table)

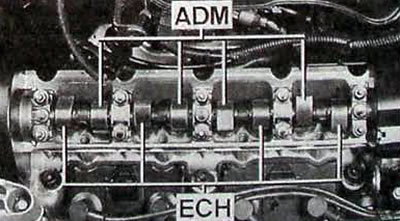
Pic. 1.2. Valve identification: ADM - intake valves. ESN - exhaust valve
| Number of the cylinder in which the exhaust valve is open | Adjusting the cylinder inlet valve | Adjusting the cylinder exhaust valve |
| 1 | 3 | 4 |
| 3 | 4 | 2 |
| 4 | 2 | 1 |
| 2 | 1 | 3 |
- Compare the measured gaps with the recommended ones.
Clearances in the valve drive mechanism on a cold engine, mm
- inlet valve 0.20;
- exhaust valve 0.40
If the measured gaps do not correspond to the required values, adjust them.
Adjustment
Valve clearances are adjusted by replacing the shims installed on the pushers. Replacing shims requires the use of a Renault Mot tool. 992 for pressing pushers or removing the camshaft.
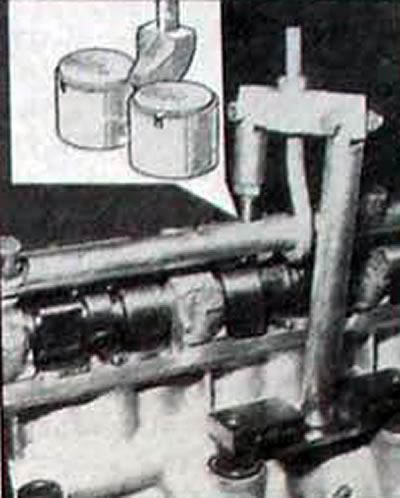
- Renault Mot. 992 press the valve pusher whose clearance needs to be adjusted and remove the adjusting washer with tweezers.
- Measure the thickness of the removed shim.
- To select the shim of the required thickness, perform the following calculations:
- Thickness of the removed shim + measured clearance - theoretical clearance = thickness of the shim. which must be installed on the pusher.
- Select a shim of the calculated thickness. If you do not have a shim of the required thickness, use a washer whose thickness is closest to the calculated thickness.
Note. The shims have a thickness of 2.90 to 3.70 mm at 0.05 mm intervals.

Pic. 1.3. Using the Renault Mot. 992 for adjusting valve clearances

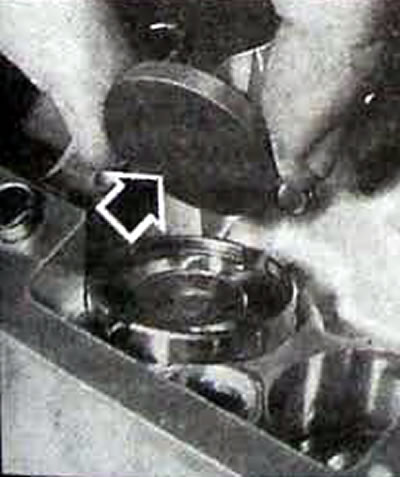
Pic. 1.4. Installing the adjusting washer with the markings facing the pusher
- Install the new shim into the pusher socket so that the washer markings face the pusher.
- Remove the Renault Mot tool. 992 to press the valve tappet.
- Adjust the remaining valve clearances in the same way.
- Lubricate the new shims with clean engine oil.
- Recheck the valve clearances and adjust them if necessary.
- Install the cylinder head cover with a new gasket and secure with bolts and nuts.
- Connect the electrical connector to the cylinder recognition sensor at the beginning of the intake stroke.
