Attention:
It is strictly forbidden to apply any pressure to the engine oil pan. Damage to the sump can also cause various damage to the engine itself due to:
- blocking the oil intake;
- increasing the engine oil level above the maximum mark, which can cause the engine to run wild.
Removing
1. Remove the engine with gearbox assembly.
2. Disconnect the engine from the gearbox.
3. Remove the attachment drive belt.
4. Install flywheel retainer (Mot. 582-01) to the cylinder block.
5. Remove the crankshaft pulley.
6. Remove the clutch discs.
7. Remove the flywheel with locking device (Mot. 582-01).
8. Remove the crankshaft seal from the gearbox side (see related section below).
9. Place the engine on the assembly stand.
10. Drain the engine oil from the engine.
11. Remove the toothed belt to the timing gear drives
12. Remove the air filter unit
13. Remove rocker cover.
14. Remove the cylinder head
15. Remove the crankshaft seal from the timing drive side (see relevant section below).
16. Remove the oil pan from the engine (see chapter "Lubrication system").
17. To turn away bolts of fastening and to remove an end cover of a cranked shaft.
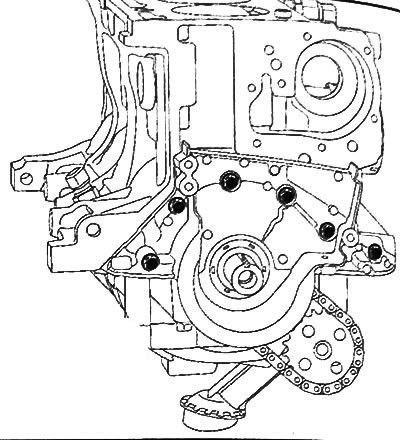
18. Remove the oil pump with the drive chain and drive sprocket (see chapter "Lubrication system").
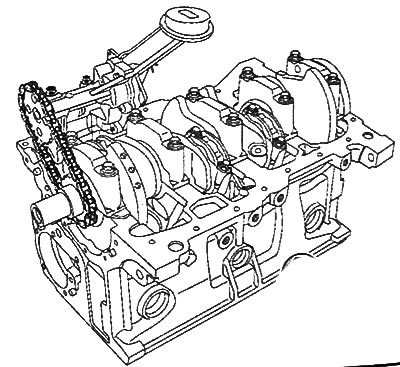
Caution: Do not use sharp tools to mark the connecting rod caps as this may cause a crack to develop. Use a marker for marking.
19. Mark the connecting rods and connecting rod caps relative to the engine cylinders with a marker (Cylinder #1 is on the flywheel side).
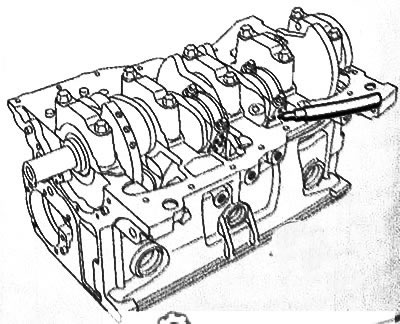
20. Unscrew the connecting rod nuts and remove the connecting rod caps.
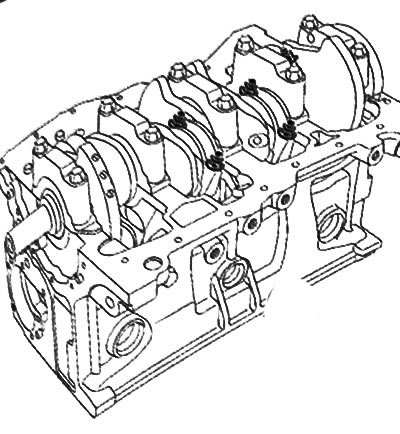
21. Remove connecting rods from crankshaft.
22.Check that the number marks on the crankshaft main bearing caps made by the manufacturer are legible (bearing #1 is on the flywheel side).
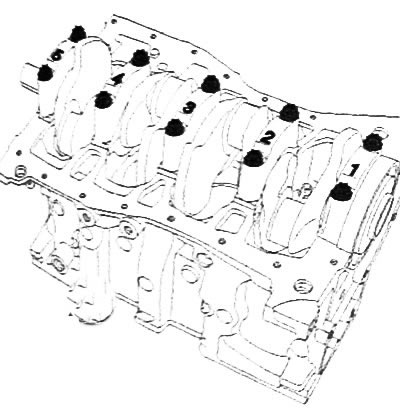
Caution: Do not use sharp tools to mark the main bearing caps as this may cause a crack to develop. Use a marker for marking.
23. If necessary, mark the crankshaft main bearing caps and their installation direction with a marker.
Note: Be sure to mark with a marker the position of each main bearing shell relative to the crankshaft bearing journals.
24. To turn away bolts of fastening and to remove covers of radical bearings of a cranked shaft.
25. To take a cranked shaft from the block of cylinders.
26. To take persistent half rings from the block of cylinders.
Installation
Attention:
- Be sure to replace the connecting rod bolts and main bearing cap bolts with new ones after each removal.
- The sealing surfaces must be clean, dry and free from grease to ensure the required tightness (avoid any fingerprints).
Note: Do not strike or warp the contact surfaces of the main bearing caps to prevent damage.
1. Clean the crankshaft, main bearing caps, main bearing shell housings in the cylinder block and the contact surfaces of the cylinder block with the main bearing caps with a cleaning agent.
Attention: For the following operation, use goggles with protective sidewalls.
2. Dry all parts with compressed air.
Note: When replacing the crankshaft or crankshaft main bearing shells, be sure to determine the thickness class of each bushing to ensure the required clearance in the crankshaft main bearings (see below). Crankshaft main bearing clearance mismatch can cause engine damage.
3. Select the main bearing shells of the appropriate size groups (see below).
4. Install the grooved main bearing shells in the cylinder block seats:
- Install the main bearing shell installer (Mot. 1493-01) to the cylinder block.
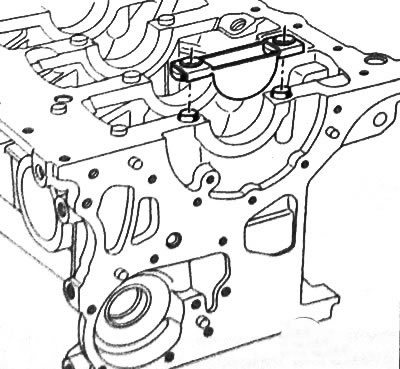
- Insert the main bearing shell with groove into the tool (Mot. 1493-01).
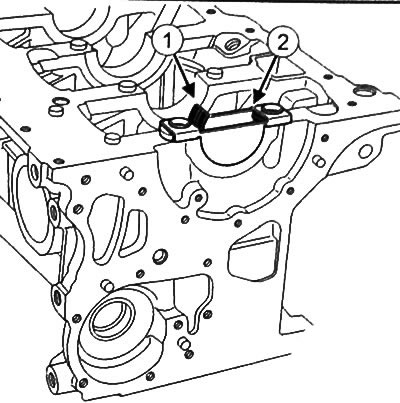
- Press in the main bearing (1) so that it comes into contact with the bar (2) fixtures.
5. Insert the main bearing shells into the caps:
Note:
- Grooved bushings are installed in No. 2 and No. 4 main bearing caps.
- Non-grooved bushings are installed in main bearing caps Nos. 1, 3 and 5.
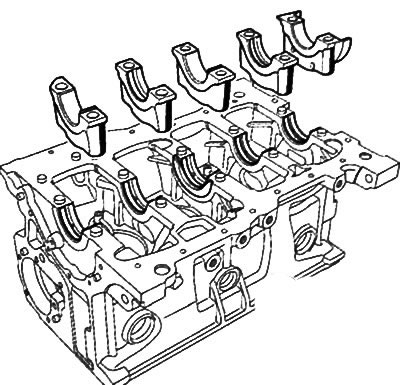
- Install the main bearing shell installer (Mot. 1493-01) on the main bearing cap.
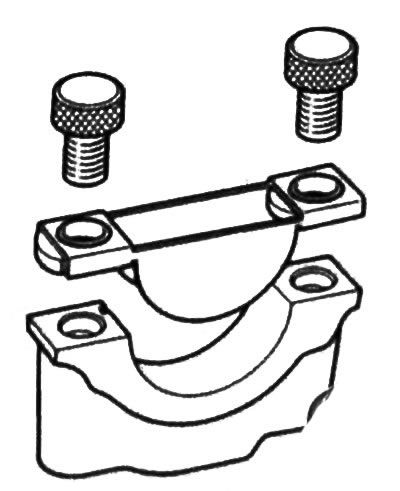
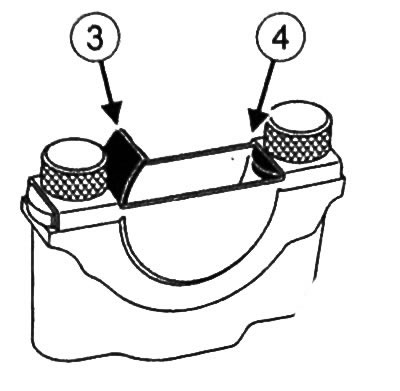
- Insert the grooved crown bearing shell into the tool (Mot 1493-01).
- Press in the main bearing (3) so that it enters into contact with the bar (4) fixtures
6. Place the thrust washers on the bearing neck No. 3 of the crankshaft with the grooves facing out.
7. Apply oil to the crankshaft main bearing shells (only on surfaces in contact with the crankshaft).
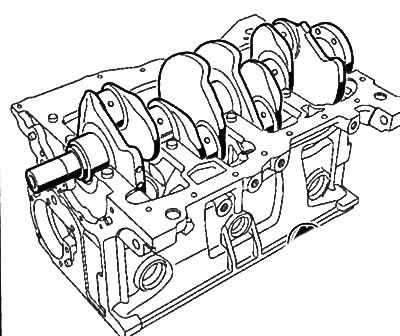
8. Install the crankshaft in the cylinder block.
Caution: Excess applied sealant may be squeezed out when tightening threaded connections. Sealant entering the coolant may cause damage to some components (engine, radiator, etc.).
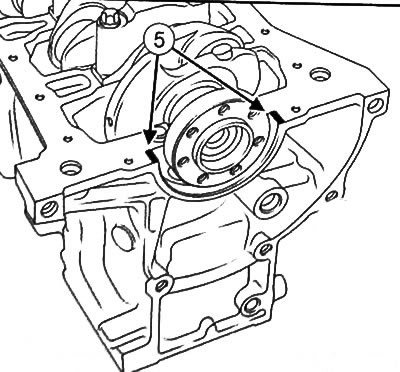
9. Apply two rollers (5) sealant 1 mm thick on the seating surfaces of the cover No. 1 of the crankshaft main bearing.
10. Observing the direction of installation and numbering, install the caps of the main bearings, placing the cap No. 1 on the side of the flywheel.
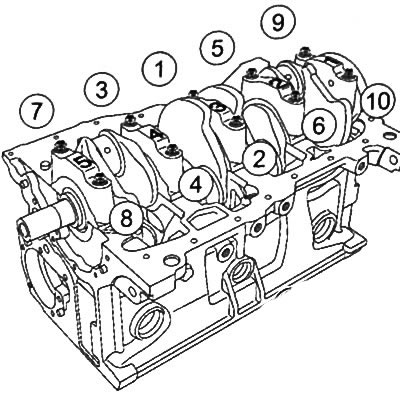
11. Tighten the main bearing cap bolts to 25 Nm, then tighten another 47°±5°.
12. Make sure that the crankshaft rotates easily and without jamming.
13. Install pistons with connecting rods (see relevant section above).
Note: Make sure that all moving parts move freely and without jamming.
14. Install oil pump with drive chain and drive sprocket (see chapter "Lubrication system").
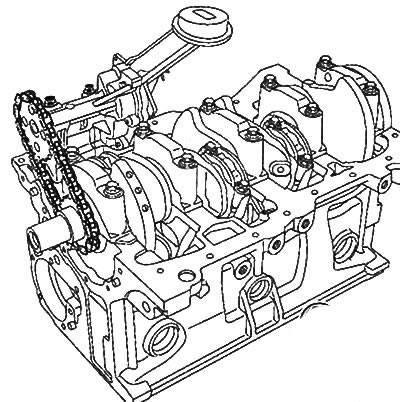
15. Apply a 1mm bead of sealant to the crankshaft endplate as shown.
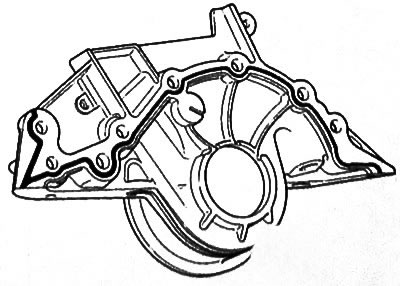
16. Install crankshaft end panel.
Attention:
- Contact surfaces must be clean, dry and free of fingerprints.
- Excess applied sealant may be squeezed out when tightening threaded connections. Sealant entering the coolant may cause damage to some components (engine, radiator, etc.).
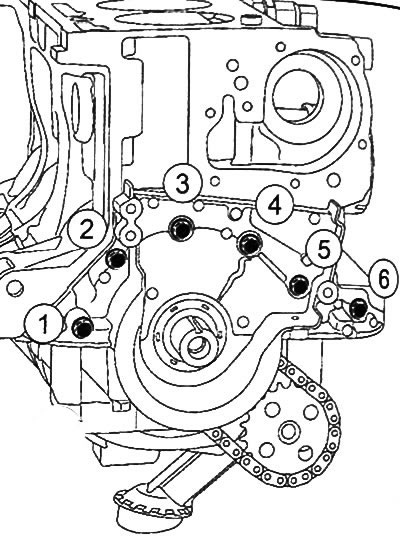
17. Tighten the end panel mounting bolts in the sequence shown in the figure to a torque of 12 Nm.
18. Install the crankshaft seal on the timing drive side (see related section below).
19. Install the engine oil pan.
20. Install the cylinder head.
21. Install rocker cover.
22. Install the air filter unit.
23. Install the timing belt.
24. Remove the engine from the assembly stand.
25. Install the crankshaft oil seal on the gearbox side (see related section below).
26. Install the flywheel.
27. Install clutch discs.
28. Install the flywheel retainer (Mot. 582-01) to the cylinder block.
29. Install the crankshaft pulley
30. Remove the flywheel retainer (Mot. 582-01) from the cylinder block.
31. Install the drive belt of the applied equipment.
32. Fill the engine with oil
33. Connect the gearbox to the engine.
34. Install the engine with gearbox on the car.
