Removing
1. Remove the glass cleaner arms, see the relevant chapter.
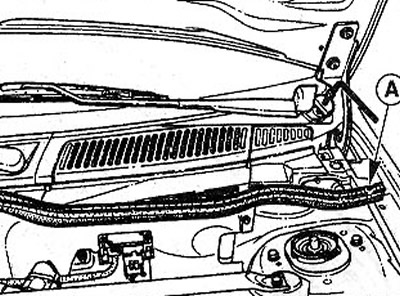
2. Remove, by pulling up, the sealing gum A (see illustration).

5.2 Pull up the sealing rubber A
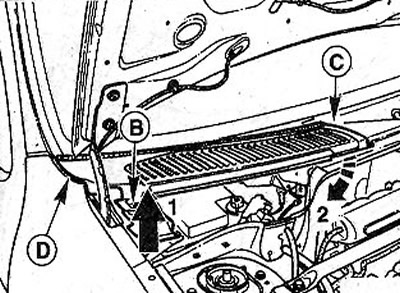
3. Unscrew bolt B and slightly raise the cover by pushing it in the direction of arrow 1 (see illustration).

5.3 Unscrew bolt B and slightly raise the cover by pushing it in the direction of arrow 1
4. Right side of the car. Lift the lid at point C and push it forward as shown by arrow 2 in illustration 5.3, while releasing it at point D.
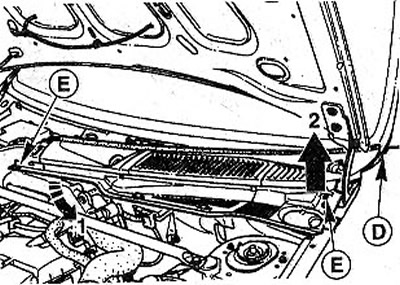
5. Left side of the car. Unscrew the two bolts E. Push the cover forward as shown by arrow 1 in the illustration, simultaneously detaching it at point D.

5.5 Unscrew the two screws E
6. Remove the cover by lifting it up as shown by arrow 2 in illustration 5.5.
Installation
7. Install the left cover with side D into the corresponding groove, and then, acting in the reverse order of removal, feed the cover back and secure with a bolt.
Install the right cover in the same way.
8. Lay a sealing gum on a ledge of a partition of a motor compartment.
9. Install the glass cleaner arms, see the appropriate chapter.
SCENIC cars
Removing
10. Remove the glass cleaner levers, see the relevant chapter.
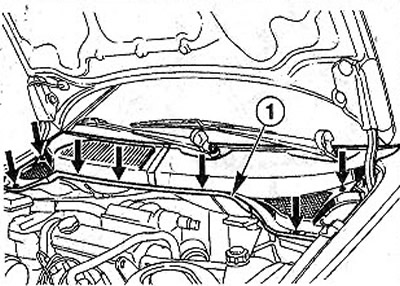
11. Remove the sealing gum 1 (see illustration).

5.11 Remove sealing rubber 1
12. Unscrew seven bolts of fastening (see arrows in illustration 5.11).
13. Press the left and right parts of the fairing cover to the middle of the lower edge of the windshield, remove the fixing pins from the left and right sides.
14. Pull both parts of the cover forward, disconnect from the windshield and remove.
Installation
15. Establish in dredging at first the left, and then the right part of a fairing and press them to a windscreen.
16. Install the fixing pins at the ends of the fairing.
17. Fix both parts of a fairing seven bolts.
18. Put on the sealing gum so that it sits on the bulkhead and on the fairing cover.
19. Install the glass cleaner arms, see the appropriate chapter.
